
These Salted Caramel Pretzel Bars deliver the kind of dessert satisfaction that feels special yet effortless. With a crunchy pretzel base, a rich caramel center, and a soft creamy topping, this recipe brings together sweet and salty flavors in a way that feels balanced and comforting. Because these bars come together without baking, they work perfectly for busy days, warm weather, or anytime you want a reliable dessert without extra steps. If you enjoy desserts that look impressive but feel approachable, this recipe belongs in your regular rotation.
Story & Introduction
I started making Salted Caramel Pretzel Bars during summers when turning on the oven felt unnecessary and unappealing. I wanted something chilled, structured, and satisfying, yet easy enough to prepare ahead for gatherings. These bars quickly became a go-to because they combine pantry staples with a texture that always earns compliments. The salty pretzel crust supports the caramel beautifully, while the creamy topping softens each bite. Over time, Salted Caramel Pretzel Bars proved dependable for parties, family nights, and quick treats. They also fit perfectly into a sweet salty treat category that people consistently crave, making them one of my most requested desserts.
Print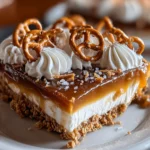
Salted Caramel Pretzel Bars
- Total Time: 2 hours 20 minutes
- Yield: 9 bars 1x
- Diet: Vegetarian
Description
Quick no-bake salted caramel pretzel bars with a crunchy pretzel crust, rich caramel layer, and creamy whipped topping.
Ingredients
- 2 cups pretzel crumbs
- 1/2 cup unsalted butter, melted
- 1/4 cup granulated sugar
- 1 cup caramel sauce
- 1/2 teaspoon sea salt
- 1 cup heavy cream
- 1/2 cup powdered sugar
- 1 teaspoon vanilla extract
Instructions
- Combine pretzel crumbs, melted butter, and sugar until evenly mixed
- Press the mixture firmly into a greased 9×9-inch pan to form the crust
- Spread caramel sauce evenly over the crust and sprinkle with sea salt
- Whip heavy cream with powdered sugar and vanilla until stiff peaks form
- Spread the whipped topping evenly over the caramel layer
- Cover and refrigerate until fully set, then slice into bars
Notes
- Press the pretzel crust firmly so the bars hold together
- Use high-quality caramel sauce for best flavor
- Chill for the full time before slicing for clean edges
- Store leftovers refrigerated in an airtight container
- Prep Time: 20 minutes
- Category: Dessert
- Method: No-Bake
- Cuisine: American
Nutrition
- Serving Size: 1 bar
- Calories: 320
- Sugar: 24 g
- Sodium: 210 mg
- Fat: 18 g
- Saturated Fat: 11 g
- Unsaturated Fat: 7 g
- Trans Fat: 0 g
- Carbohydrates: 38 g
- Fiber: 1 g
- Protein: 3 g
- Cholesterol: 55 mg
Ingredients
-
2 cups pretzel crumbs
-
1/2 cup unsalted butter, melted
-
1/4 cup granulated sugar
-
1 cup caramel sauce
-
1/2 teaspoon sea salt
-
1 cup heavy cream
-
1/2 cup powdered sugar
-
1 teaspoon vanilla extract
Step-by-Step Instructions
Preparing the Ingredients
Start by crushing the pretzels into fine crumbs using a food processor or sealed bag and rolling pin, then measure all ingredients precisely. Melt the butter gently so it blends smoothly with the pretzel crumbs and sugar. Set the caramel sauce at room temperature so it spreads easily, and chill the mixing bowl for the cream to help it whip evenly.
Cooking Instructions
Mix pretzel crumbs, butter, and sugar until combined, then press firmly into a greased pan to form a compact crust. Spread caramel evenly across the surface and sprinkle with sea salt for balance. Whip the cream with powdered sugar and vanilla until thick, then layer it smoothly over the caramel. Chill until firm before slicing into neat bars.
Tips for Perfect Results
Common Mistakes to Avoid
Loose crusts happen when the pretzel base is not packed tightly enough, so press firmly using a flat surface. Avoid overly warm caramel, which can blend into the crust instead of forming a clean layer. Overwhipping the cream can cause grainy texture, so stop once stiff peaks form.
Pro Tips for Better Flavor
Use a high-quality caramel sauce for depth and consistency, and choose pretzels with a clean, salty finish. A pinch of flaky sea salt on top adds contrast and visual appeal. For gatherings, prepare the bars a day ahead so the layers fully set and slice cleanly.
Serving and Storage
How to Serve
Serve these chilled bars straight from the refrigerator for the best structure and contrast. They pair well with coffee, iced drinks, or milk and work beautifully as easy party dessert options for casual or formal settings.

How to Store Leftovers
Store leftover bars in an airtight container in the refrigerator for up to seven days. For clean slices, separate layers with parchment paper. Avoid freezing, as the whipped topping can lose its smooth texture after thawing.
Frequently Asked Questions
Can I make these bars ahead of time?
Yes, these bars work exceptionally well when made in advance. Preparing them the day before allows the layers to set fully, resulting in cleaner slices and better texture when served.
Are these considered no-bake dessert bars?
Absolutely, these bars fall squarely into the no bake dessert bars category because the recipe relies entirely on chilling rather than oven time, making them convenient year-round.
Can I change the crust flavor?
You can substitute flavored pretzels or mix in crushed graham crackers, though pretzels create the best contrast for pretzel crust bars with caramel.
Conclusion
These Salted Caramel Pretzel Bars combine simplicity with bold flavor, making them ideal for anyone who loves dependable desserts. With no oven required and minimal preparation, they suit busy schedules while still feeling special. Once you make them, they quickly become a repeat recipe that fits holidays, potlucks, and everyday cravings alike.
Discover more delicious recipes by following me on Facebook and Pinterest.