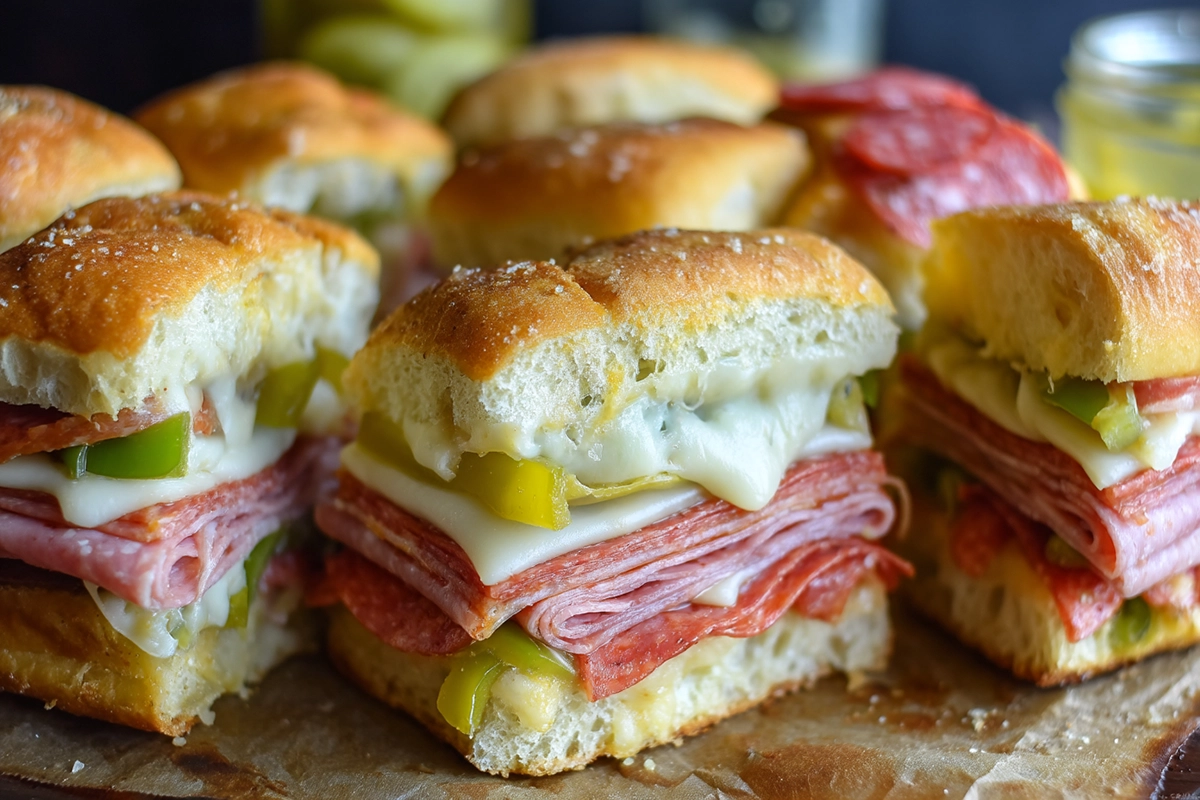
Whether you’re throwing a game day bash, planning a weekend get-together, or just need an easy dinner idea, Hot Italian Sub Sliders are the way to go. These mini sandwiches are stacked with bold, savory flavors and baked until golden and melty. They’ve got that classic Italian sub taste, but in bite-sized form—perfect for feeding a crowd without the mess. This guide will walk you through everything you need to know about making these sliders, from what goes inside to how to serve them like a pro.
Introduction
What Are Hot Italian Sub Sliders?
Hot Italian Sub Sliders are mini baked sandwiches filled with layers of deli meats, cheeses, and tangy toppings—all packed into soft slider rolls. They’re brushed with a seasoned buttery glaze, then baked until the tops are golden and the insides are gooey and irresistible. Think of them as the best parts of a traditional Italian sub, but easier to eat, quicker to make, and perfect for sharing.
These sliders aren’t just a hit at parties—they’re versatile enough for potlucks, lunches, or even lazy weeknight dinners. And the best part? You can prep them ahead and pop them in the oven when you’re ready. Talk about a time-saver.
What Makes Them So Popular?
The magic is in the contrast of textures and flavors. You’ve got the softness of the rolls, the boldness of seasoned meats, the creaminess of melted cheese, and the zip from Italian-style toppings like banana peppers or red onions. All that wrapped in a warm, buttery crust? No wonder they disappear fast.
People love them for more than just the flavor, though. These sliders are:
-
Easy to customize
-
Ready in about 30 minutes
-
Mess-free to serve and eat
-
Ideal for kids and adults alike
They check every box.
Inspired by Classic Italian Sandwiches
At their core, these sliders draw inspiration from the traditional Italian submarine sandwich. That classic usually features a lineup of deli meats, sliced cheese, shredded lettuce, tomatoes, and oil-based dressing—all stacked inside a crusty roll. But here’s the twist: instead of serving cold or assembling sandwiches individually, these sliders offer a baked and bite-sized take with a comfort food vibe.
Why You Should Keep Reading
If you’re looking for a dish that’s:
-
Big on flavor
-
Quick to prep
-
Loved by almost everyone
Then you’re in the right place. From the must-have ingredients to step-by-step instructions, plus creative ways to customize and store them—this article’s got you covered. So let’s get rolling with all the delicious details.
Understanding Hot Italian Sub Sliders
What Exactly Are Hot Italian Sub Sliders?
Hot Italian Sub Sliders are small, baked sandwiches filled with Italian-style meats, melted cheese, and savory toppings. They’re made with soft rolls, stacked with flavorful layers, then brushed with seasoned butter and baked until golden.
You can think of them as mini Italian subs. But instead of being cold and served one by one, they’re warm, baked in a batch, and easy to pull apart. That makes them perfect for parties, game nights, or busy weeknight dinners.
They’re fun to eat, quick to make, and loaded with taste.
What Goes Inside These Sliders?
Most recipes use a mix of Italian deli meats (like salami or turkey slices), slices of provolone or mozzarella, and extras like banana peppers, onions, or Italian dressing. It all comes together inside a tray of pull-apart rolls.
Once everything’s layered, a garlic-herb butter is brushed on top. That’s what gives the rolls a rich, golden crust and an extra punch of flavor.
Why Everyone Loves Them
These sliders check all the boxes:
-
Easy to make
-
Quick to bake
-
Great for feeding a crowd
Plus, you don’t need forks or knives. Just pick one up and dig in. And since they’re baked all together, there’s less cleanup too.
A Twist on a Classic
These sliders are a clever take on the well-known Italian sub sandwich. Normally, an Italian sub is served cold and built to order. But here, you get the same flavor combo—melted cheese, bold meats, and zesty toppings—in warm, bite-sized form.
They bring a comfort food feel to a deli classic.
When to Serve Them
These little sandwiches are made for:
-
Birthday parties
-
Game-day snacks
-
Potlucks
-
Family dinners
They’re also great as leftovers. Just reheat and enjoy all over again. Simple and satisfying.
Ready to learn what goes into making the best version at home? Let’s talk ingredients.
Ingredients Breakdown
The Basics You Need
You don’t need fancy ingredients to make Hot Italian Sub Sliders. Just a few simple items. The key is to choose quality and layer them well. Here’s what to grab:
Bold Bread Choices
Use Soft Rolls
Sweet rolls like Hawaiian bread work best. They’re soft, slightly sweet, and hold everything together. You can also use slider buns or dinner rolls if that’s what you have.
Skip Crusty Bread
Hard rolls break apart too easily. You want rolls that stay soft after baking.
Flavorful Meat Options
Go for Sliced Deli Meats
Use a mix of Italian meats. Salami, turkey breast, and chicken pastrami are all great picks. They bring bold flavor and work well with melted cheese.
Layer Thinly
Use thin slices. That way, everything heats evenly and each bite has a good balance.
Melted Cheese Goodness
Try Provolone or Mozzarella
These melt nicely and have a smooth taste. You can also mix in Swiss or mild cheddar for extra flavor.
Add Plenty
Don’t skimp on the cheese. It holds the sliders together and adds creaminess.
Toppings That Pop
Use Banana Peppers or Red Onions
These add zip and crunch. You can also use roasted red peppers for a smoky twist.
Keep It Balanced
Don’t overload the sliders. A little tangy topping goes a long way.
The Famous Butter Glaze
Mix Butter with Garlic and Herbs
Melted butter mixed with garlic powder, Italian seasoning, and a touch of mustard gives the top a tasty finish.
Brush It on Before Baking
This step is key. It keeps the tops from drying out and adds tons of flavor.
Every part of these sliders adds something special. The bread gives the base. The meats bring the flavor. The cheese melts and binds. The toppings add punch. And that butter glaze? It pulls it all together.
Step-by-Step Preparation Guide
Let’s Build and Bake
Making Hot Italian Sub Sliders is easy. Just follow a few simple steps. You don’t need fancy tools or cooking skills.
Step 1: Prep the Oven
Heat Things Up
Set your oven to 350°F (175°C). Let it warm up while you get everything ready.
Step 2: Cut the Rolls
Keep Them Together
Use a serrated knife. Slice the rolls in half, like one big sandwich. Keep the rolls attached. That makes it easier to build and bake.
Step 3: Layer the Fillings
Start with Cheese
Place a layer of cheese on the bottom half. It melts and sticks to the bread.
Add the Meats
Lay the deli meats evenly. Make sure to spread them from edge to edge.
Top with More Cheese
One more layer of cheese seals everything in.
Add Toppings
Sprinkle on banana peppers, onions, or whatever extras you like. Go light—you want the sliders to stay neat.
Step 4: Close and Glaze
Put the Top Half Back
Gently lay the top of the rolls over the fillings.
Brush with Butter
Melt your seasoned butter. Use a brush or spoon to spread it across the tops. Make sure every roll is covered.
Step 5: Bake to Perfection
Cover with Foil
This helps the cheese melt without burning the tops.
Bake for 20 Minutes
After that, take off the foil.
Bake 5–7 Minutes More
This step gives the tops a golden finish. Keep an eye on them—they brown fast.
Step 6: Slice and Serve
Cut and Enjoy
Use a sharp knife to cut along the roll lines. Serve hot. That’s when they taste best.
Tips for Better Results
Toast the Bottom Half First
If you want less sogginess, toast the bottom half before adding fillings.
Use Parchment Paper
Line your baking dish. It makes cleanup easier and stops sticking.
Double the Batch for Groups
Making these for a crowd? Bake two trays at once. They go fast!
See? It’s all about simple steps and good layers. Up next, we’ll explore fun ways to switch things up.
Customization and Variations
Make It Your Own
One of the best things about Hot Italian Sub Sliders is how easy they are to change. You can mix and match ingredients to fit your taste or what you have on hand. Don’t be afraid to get creative.
Switch Up the Meats
Try Different Options
Use sliced chicken, smoked turkey, or even roast beef. These all taste great and still give that bold Italian feel.
Keep It Thin
Thin cuts work best. They heat faster and layer well inside the rolls.
Go Vegetarian
Skip the Meat
Want a meat-free version? No problem. Load up with grilled veggies like bell peppers, zucchini, or mushrooms.
Add a Spread
Use pesto or olive tapenade to boost flavor. A little goes a long way.
Make It Spicy
Turn Up the Heat
Add sliced jalapeños, crushed red pepper, or spicy giardiniera. These bring heat without a heavy burn.
Balance the Spice
Use a mild cheese or a touch of honey mustard to cool things down.
Add Gourmet Touches
Use Special Cheeses
Swap regular cheese with smoked provolone or fresh mozzarella. Even a slice of brie works if you’re feeling fancy.
Drizzle with Balsamic
A little balsamic glaze after baking gives a sweet and tangy finish.
Change the Glaze
Try New Flavors
Mix your melted butter with Italian herbs, fresh garlic, or even a bit of Dijon mustard. Lemon zest or crushed basil can add a fresh twist.
Mix Up the Toppings
Try Pickled Veggies
Think beyond banana peppers. Pickled onions or artichokes can bring big flavor.
Add Crunch
A handful of shredded lettuce or slaw on top after baking adds a crisp bite.
With a few changes, you can take this simple slider and make it something brand new. Keep it easy, keep it fun, and use what you love. These little sandwiches are built for variety.
Serving Suggestions
What to Serve with Hot Italian Sub Sliders
These sliders are packed with flavor, but pairing them with the right sides can make your meal even better. Here are some easy and tasty ideas to round out your spread.
Perfect Side Dishes
Fresh Salads
A crisp salad balances the rich, cheesy sliders.
-
Try a simple Italian salad with lettuce, tomatoes, olives, and light dressing.
-
A Caesar salad also works great, especially with crunchy croutons.
Soup Options
Warm soup is always a hit.
-
Tomato basil soup adds comfort and goes well with the melted cheese.
-
Minestrone brings hearty veggies and Italian flavor to the table.
Chips and Dips
Keep it casual.
-
Serve with kettle-cooked chips for a salty crunch.
-
Add a dip like marinara or ranch on the side for extra flavor.
Fun Add-ons for Parties
Slider Bar
Let guests build their own.
-
Set out toppings like lettuce, pickles, or extra cheese.
-
Keep the sliders warm in a tray and let people customize as they like.
Kid-Friendly Picks
Kids love sliders too.
-
Add carrot sticks, fruit cups, or applesauce on the side.
-
Cut sliders in half for smaller hands.
Best Way to Serve
Serve Them Warm
These sliders taste best right out of the oven. Warm and melty is the way to go.
Use a Sharp Knife
Cut the sliders along the roll lines so they stay neat and easy to grab.
Serve in the Same Pan
No need to move them. Just place the baking dish on the table and let everyone help themselves.
Great food is more than just flavor—it’s about how you enjoy it. With the right sides and setup, these sliders become the star of any meal.
Nutritional Information
What’s Inside These Sliders?
Hot Italian Sub Sliders are tasty and filling. But if you’re keeping an eye on what you eat, it helps to know what goes into each bite.
Calories and Portions
Each Slider Packs a Punch
Depending on what you use, one slider may have around 170 to 300 calories. The meat, cheese, and butter glaze all add to the total. Want a lighter version? Use less cheese or lean meats.
Smaller Rolls, Fewer Calories
Mini rolls mean smaller portions. They’re easier to control and perfect for snacks or lighter meals.
Macronutrients Breakdown
Good Amount of Protein
The meats and cheese give you a solid protein boost. That’s good for energy and staying full longer.
Watch the Fats
Butter and cheese add fat. It’s what makes sliders rich and satisfying. But if you want less fat, try low-fat cheese or skip the butter glaze.
Some Carbs, But Not Too Much
The rolls bring carbs. Stick to one or two sliders if you’re cutting back. You can also try whole-grain rolls for more fiber.
Healthier Tweaks
Use Lean Meats
Choose roasted turkey or chicken. They have less fat but still taste great.
Add Veggies
Layer in spinach, tomatoes, or roasted peppers. They add flavor and nutrients without extra calories.
Skip Extra Butter
You can use olive oil spray instead of butter for a lighter top.
Allergy-Friendly Tips
Go Gluten-Free
Use gluten-free rolls. Many stores now carry great options that still taste soft and fresh.
Dairy-Free Options
Try plant-based cheese. Some brands melt well and taste close to real cheese.
These sliders can be rich, but you’re in charge of the final result. With a few swaps, they can fit into just about any eating plan. Tasty and smart? That’s a win.
Storage and Reheating
What to Do with Leftovers
Made too many Hot Italian Sub Sliders? No worries. They store and reheat well, so you can enjoy them later.
Make-Ahead Tips
Assemble, Then Chill
You can put the sliders together a few hours ahead. Just don’t bake them yet.
-
Build your sliders as usual.
-
Cover the tray with foil or wrap.
-
Keep them in the fridge until it’s time to bake.
This is great for parties or busy nights.
Avoid Soggy Bread
Add toppings like peppers right before baking. This keeps the rolls from getting too wet
Storing Leftovers
Cool Before Storing
Let sliders cool to room temperature first. Then:
-
Place them in an airtight container.
-
Store in the fridge for up to 3 days.
Freeze for Later
Want to save them longer?
-
Wrap each slider in foil or plastic.
-
Place in a freezer bag.
-
They’ll keep for about 1 month.
Reheating Tips
Use the Oven
Preheat the oven to 300°F (150°C).
-
Place sliders on a tray.
-
Cover with foil to keep them soft.
-
Heat for 10 to 15 minutes.
Skip the Microwave
Microwaving can make the bread soggy. If you’re in a rush, try a toaster oven instead.
Best Way to Reheat Frozen Sliders
-
Let them thaw in the fridge overnight.
-
Reheat in the oven the same way.
-
Add fresh glaze if you want that buttery top again.
Sliders are simple to store and easy to reheat. That means no waste and more chances to enjoy every bite.
Frequently Asked Questions (FAQ)
Quick Answers About Hot Italian Sub Sliders
Got questions? You’re not alone. Here are the most common ones people ask about Hot Italian Sub Sliders.
Can I make them ahead of time?
Yes, you can.
Assemble the sliders a few hours early. Keep them in the fridge until you’re ready to bake. Wait to brush on the butter glaze until just before baking.
How do I stop them from getting soggy?
Toast the bottom half first.
Bake the bottom rolls for 5 minutes before adding the fillings. Also, don’t use too much sauce or wet toppings.
What can I use instead of Hawaiian rolls?
Try soft dinner rolls.
Slider buns or brioche rolls work well too. Just avoid hard or crusty bread.
Can I freeze baked sliders?
Yes, and it’s easy.
Wrap each one tightly. Use foil or plastic wrap. Then place them in a freezer bag. Reheat in the oven when you’re ready to eat.
How long do leftovers last in the fridge?
About 3 days.
Store them in a sealed container. Reheat in the oven so they stay soft and warm.
Can I make a vegetarian version?
Absolutely.
Use grilled veggies, spinach, or plant-based deli slices. Add a flavorful cheese or spread to boost the taste.
What cheese is best for these sliders?
Provolone and mozzarella are top picks.
They melt well and taste great. You can also try Swiss or a cheese blend.
Can I serve them cold?
They’re better hot.
The cheese melts, and the rolls turn soft and golden when baked. That’s when they taste their best.
How many sliders should I make per person?
Plan for 2–3 per guest.
These go fast, especially at parties. Better to make extra than run out.
Do I need to use meat?
Not at all.
Sliders can still taste great with just cheese, veggies, and tasty toppings.
Need more ideas? Try switching up the ingredients or adding your favorite sauce. These sliders are all about having fun in the kitchen.
Conclusion
Why Hot Italian Sub Sliders Are a Must-Try
Hot Italian Sub Sliders are simple, tasty, and full of flavor. They’re easy to make, and everyone loves them. Whether it’s a party, a picnic, or just dinner at home, these sliders fit right in.
So Many Reasons to Love Them
-
They bake in one pan.
-
They’re great for sharing.
-
You can make them ahead.
-
You can change the fillings anytime.
They check all the boxes for a quick, crowd-pleasing meal.
Quick to Make, Easy to Enjoy
You don’t need fancy tools or ingredients. Just fresh rolls, good cheese, and your favorite toppings. Add a buttery glaze and pop them in the oven. That’s it.
They’re fun to serve and even more fun to eat.
Try Your Twist
Feel free to get creative. Use what you have. Add your favorite sauces. Switch up the meat or go meat-free. There’s no wrong way to make them.
Hot Italian Sub Sliders aren’t just a recipe—they’re a go-to solution for feeding family and friends with ease. Once you try them, they’ll become a regular in your meal rotation.
Ready to make your next gathering extra delicious? These sliders have you covered.
Print
Hot Italian Sub Sliders: The Ultimate Party Appetizer
5 Stars 4 Stars 3 Stars 2 Stars 1 Star
No reviews
- Author: Amanda Thompson
- Total Time: 35–40 minutes
- Yield: 12 sliders 1x
Description
Hot Italian Sub Sliders are bite-sized, baked sandwiches filled with layers of deli meats, melted cheese, and tangy toppings. Brushed with a garlic-herb butter glaze, they’re baked until golden and gooey. Inspired by classic Italian submarine sandwiches, these sliders offer all the flavors of the original but in an easy-to-share, warm, and satisfying form.
Ingredients
-
12 slider rolls (Hawaiian or soft dinner rolls)
-
1 lb boneless, skinless chicken breast or turkey breast (thinly sliced)
-
8 oz provolone or mozzarella cheese (sliced)
-
1 cup banana peppers or roasted red peppers (optional)
-
1 medium red onion (thinly sliced, optional)
-
4 tablespoons unsalted butter (melted)
-
1 teaspoon garlic powder
-
1 teaspoon dried Italian seasoning
-
1 teaspoon Dijon mustard (optional)
-
Salt and black pepper (to taste)
Optional Add-ins:
-
Swiss cheese or cheddar for variation
-
Pesto or olive tapenade for extra flavor
-
Sliced tomatoes or pickles for crunch
Substitutions:
-
Use gluten-free rolls for a gluten-free version.
-
Try using plant-based meats or grilled vegetables for a vegetarian version.
-
Replace mustard with mayonnaise or balsamic glaze for different flavors.
Instructions
-
Prep the Oven:
Preheat your oven to 350°F (175°C). -
Prepare the Rolls:
Slice the slider rolls in half, keeping them connected as one large piece. Place them in a baking dish. -
Layer the Ingredients:
-
Add a layer of cheese to the bottom half of the rolls.
-
Layer deli meats evenly on top.
-
Add more cheese and any additional toppings like peppers or onions.
-
-
Brush with Butter Glaze:
-
Mix melted butter with garlic powder, Italian seasoning, and Dijon mustard.
-
Brush the glaze evenly over the top of the rolls.
-
-
Bake:
-
Cover with foil and bake for 20 minutes.
-
Remove foil and bake for another 5–7 minutes until the tops are golden and crispy.
-
-
Slice and Serve:
-
Cut into individual sliders and serve warm.
-
Notes
Customize: Feel free to add more or fewer toppings to suit your taste. Fresh vegetables like tomatoes or spinach can be a nice touch.
Make Ahead: Assemble the sliders up to 2 hours in advance and store them covered in the fridge. Bake just before serving.
- Prep Time: 10 minutes
- Cook Time: 25–30 minutes
- Category: Appetizer / Main Dish
- Method: Baking
- Cuisine: Italian-American