
Strawberry Cake Balls are a quick, sweet treat that brings together the flavor of fresh-baked cake and the charm of bite-sized desserts. This recipe keeps things simple while delivering soft texture, bright strawberry flavor, and a beautiful pink finish that works for parties, holidays, or gifting. If you enjoy cake mix truffles or easy no-bake style desserts, these Strawberry Cake Balls will quickly become a favorite. They come together fast, store well, and feel special without extra effort.
Strawberry Cake Balls became a go-to dessert in my kitchen when I needed something festive but fast. Instead of complicated decorating or dipping, these Strawberry Cake Balls rely on flavor and texture to shine. Using a baked strawberry cake gives them structure, while freeze-dried berries boost the taste without extra moisture. Over time, I found that Strawberry Cake Balls work just as well for casual weekends as they do for celebrations like valentine cake pops without sticks. They look polished, taste fresh, and always disappear quickly.
Ingredients
-
1 box strawberry cake mix
-
2 tablespoons vanilla frosting
-
1/2 cup freeze-dried strawberries
-
1 cup powdered sugar
-
1–2 tablespoons edible pink pearl dust
-
Mini heart-shaped sprinkles for variation
Step-by-Step Instructions
Preparing the Ingredients
Bake the strawberry cake according to the package directions and allow it to cool fully before handling. While the cake cools, crush the freeze-dried strawberries into small pieces and set them aside, then place the powdered sugar into a medium bowl so it is ready for coating later.
Cooking Instructions
Crumble the cooled cake into a large bowl until no chunks remain, then mix in the freeze-dried strawberries evenly. Add the vanilla frosting one tablespoon at a time, stirring well after each addition until the mixture holds together when pressed without feeling sticky. Roll about two tablespoons of the mixture into smooth balls, coat them in powdered sugar, and finish by dusting lightly with pearl dust or rolling in sprinkles for pink dessert bites.
Tips for Perfect Results
Common Mistakes to Avoid
Avoid adding too much frosting at once because excess moisture will make the Strawberry Cake Balls soft and difficult to shape. Skipping the full cooling time can also cause a gummy texture, so patience matters before crumbling the cake.
Pro Tips for Better Flavor
Use high-quality freeze-dried strawberries for a stronger berry taste and brighter color. For extra richness, choose a smooth vanilla frosting that blends easily and supports the cake without overpowering the strawberry notes found in vanilla buttercream treats.
Serving and Storage
How to Serve
Serve Strawberry Cake Balls chilled or at room temperature on a decorative platter, making them ideal no stick cake balls for parties, showers, or dessert boards. They pair well with coffee, tea, or sparkling drinks.

How to Store Leftovers
Store leftover Strawberry Cake Balls in an airtight container in the refrigerator for up to five days. Let them sit at room temperature for a few minutes before serving so the texture softens slightly.
Conclusion
Strawberry Cake Balls offer an easy way to create a dessert that feels thoughtful and festive without complicated steps. With simple ingredients and reliable results, this recipe proves that small treats can still make a big impression.
Discover more delicious recipes by following me on Facebook and Pinterest.
Frequently Asked Questions
Can I make Strawberry Cake Balls ahead of time?
Yes, Strawberry Cake Balls can be prepared one to two days in advance and stored in the refrigerator until ready to serve, which makes them convenient for events.
Can I freeze Strawberry Cake Balls?
You can freeze them in a sealed container for up to one month, then thaw overnight in the refrigerator before serving.
Do I need pearl dust for this recipe?
Pearl dust is optional, and you can substitute sprinkles or leave the powdered sugar coating plain for a simple finish.
Print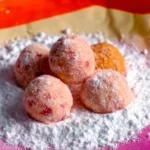
Strawberry Cake Balls
- Total Time: 40 minutes
- Yield: 4 servings 1x
Description
Juicy grilled chicken stacked over white rice with caramelized pineapple and a savory-sweet teriyaki glaze inspired by Hawaiian Huli Huli chicken.
Ingredients
- 1.5 lbs boneless skinless chicken breasts or thighs
- 1/2 cup low-sodium teriyaki sauce
- 1/3 cup pure pineapple juice
- 1/4 cup low-sodium soy sauce
- 3 tablespoons dark brown sugar
- 2 garlic cloves minced
- 1 tablespoon fresh grated ginger
- 1 teaspoon toasted sesame oil
- 4 fresh pineapple rings
- Cooked white rice
- 2 tablespoons sliced green onions
- 1 teaspoon sesame seeds
Instructions
- Whisk teriyaki sauce pineapple juice soy sauce brown sugar garlic ginger and sesame oil in a bowl
- Place chicken in a bag or dish and pour marinade over it then refrigerate for at least 2 hours
- Preheat grill or grill pan to medium-high heat
- Remove chicken from marinade and reserve marinade
- Grill chicken for 6 to 7 minutes per side until cooked through
- Grill pineapple rings for 2 to 3 minutes per side until caramelized
- Boil reserved marinade in a saucepan for 5 to 6 minutes until thick
- Layer rice chicken pineapple and drizzle glaze on top then garnish
Notes
- Chicken can be cooked on a stovetop grill pan or baked in the oven
- Add chili sauce if heat is desired
- Store chicken and pineapple separately for meal prep
- Prep Time: 15 minutes
- Cook Time: 25 minutes
- Category: Dinner
- Method: Grilling
- Cuisine: Hawaiian
Nutrition
- Serving Size: 1 stack
- Calories: 520
- Sugar: 14g
- Sodium: 980mg
- Fat: 14g
- Saturated Fat: 3g
- Unsaturated Fat: 9g
- Trans Fat: 0g
- Carbohydrates: 55g
- Fiber: 3g
- Protein: 38g
- Cholesterol: 110mg