
Red Velvet Brownies are the kind of dessert that feel special without being complicated. This recipe delivers deep chocolate flavor, a vibrant red crumb, and a soft, fudgy center that makes every bite count. If you enjoy homemade brownies that come together quickly and still look impressive, this is the recipe to keep close. With simple pantry ingredients and straightforward steps, these brownies work for weeknight cravings, celebrations, or gifting. The balance of cocoa, butter, and vanilla creates a texture that stays moist while baking evenly in a small pan. Once you try them, Red Velvet Brownies may become your go-to chocolate bake.
Red Velvet Brownies became a staple in my kitchen when I wanted something richer than cake but more festive than classic brownies. I needed a recipe that felt intentional yet stayed simple enough for busy days. These Red Velvet Brownies answered that need perfectly. They bake up dense and soft with a bold color that stands out on any dessert table. I like how Red Velvet Brownies rely on cocoa and real chocolate rather than excess frosting. Because the batter mixes quickly, Red Velvet Brownies also suit last-minute plans. Over time, this recipe turned into my favorite red velvet dessert when I want consistent results.
Ingredients
-
3/4 cup unsalted butter, melted
-
2 oz semi-sweet chocolate bar, chopped
-
1 1/4 cups granulated sugar
-
2 large eggs
-
2 teaspoons vanilla extract
-
1 teaspoon white vinegar
-
1/2 tablespoon red gel food coloring
-
2 tablespoons unsweetened cocoa powder
-
1 1/4 cups all-purpose flour
-
1/4 teaspoon salt
-
1/2 cup white chocolate chips (optional)
Step-by-Step Instructions
Preparing the Ingredients
Start by preheating the oven to 350°F and lining an 8×8-inch pan with parchment paper so removal stays clean. Melt the butter and chopped chocolate together in a microwave-safe bowl using short intervals, stirring often until smooth. Let the mixture cool slightly, then stir in the sugar until glossy. Add the eggs one at a time, mixing well after each addition, then stir in vanilla, vinegar, and food coloring until evenly blended.
Cooking Instructions
In a separate bowl, sift the cocoa powder, flour, and salt so the batter stays lump-free. Gradually fold the dry ingredients into the wet mixture just until combined, keeping the texture thick and smooth. If using white chocolate chips, gently fold them in. Spread the batter evenly in the prepared pan and bake for 30 to 35 minutes. A toothpick should show moist crumbs, not wet batter. Cool completely before slicing.
Tips for Perfect Results
Common Mistakes to Avoid
Overmixing the batter can make brownies tough, so stop stirring as soon as the flour disappears. Baking too long dries out the center, which takes away the signature fudgy texture. Skipping parchment paper may cause sticking and uneven edges. Measuring cocoa carefully matters because too much can overpower the red velvet flavor balance. Letting the brownies cool fully helps them set cleanly.
Pro Tips for Better Flavor
Use high-quality cocoa powder for deeper chocolate notes and smoother color. Red gel food coloring works better than liquid since it keeps the batter thick. For extra richness, drizzle melted white chocolate over cooled brownies. Chilling the brownies for thirty minutes before slicing creates sharper edges. These tips also make this recipe feel like a fudgy brownie recipe worth repeating.
Serving and Storage
How to Serve
Serve Red Velvet Brownies at room temperature for the best texture and flavor. They pair well with a glass of milk or hot coffee. For a festive presentation, add a white chocolate drizzle or dust lightly with powdered sugar. These brownies also work well on dessert platters for holidays, especially as a valentine chocolate treat that looks intentional.

How to Store Leftovers
Store leftover brownies in an airtight container at room temperature for up to three days. For longer storage, refrigerate them for up to one week without losing moisture. You can also freeze individual squares wrapped tightly for up to two months. Let frozen brownies thaw at room temperature before serving for best texture.
Conclusion
These Red Velvet Brownies prove that scratch baking does not need to feel complicated to deliver bold results. The rich cocoa flavor, soft crumb, and vibrant color make them reliable for both casual cravings and special moments. Because the recipe stays simple, you can bake with confidence every time. If you enjoy scratch baking that feels rewarding, this brownie recipe deserves a place in your rotation.
Discover more delicious recipes by following me on Facebook and Pinterest.
Frequently Asked Questions
Can I make these brownies without food coloring?
Yes, you can skip the food coloring if you prefer. The brownies will taste the same, but the color will resemble classic chocolate brownies instead of red velvet.
How do I know when the brownies are done baking?
Insert a toothpick into the center near the end of baking. If it comes out with a few moist crumbs, the brownies are ready. Wet batter means they need more time.
Can I double this recipe for a larger pan?
Yes, you can double the ingredients and bake in a 9×13-inch pan. Increase the baking time slightly and check doneness with a toothpick to avoid overbaking.
Print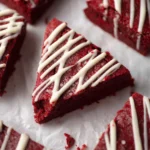
Red Velvet Brownies
- Total Time: 45 minutes
- Yield: 16 servings 1x
- Diet: Vegetarian
Description
Fudgy red velvet brownies with rich cocoa flavor and a soft center, finished with optional white chocolate chips or a drizzle.
Ingredients
- 3/4 cup unsalted butter, melted
- 2 oz semi-sweet chocolate bar, chopped
- 1 1/4 cups granulated sugar
- 2 large eggs
- 2 teaspoons vanilla extract
- 1 teaspoon white vinegar
- 1/2 tablespoon red gel food coloring
- 2 tablespoons unsweetened cocoa powder
- 1 1/4 cups all-purpose flour
- 1/4 teaspoon salt
- 1/2 cup white chocolate chips (optional)
Instructions
- Preheat your oven to 350°F and line an 8×8 inch baking pan with parchment paper.
- In a large microwave-safe mixing bowl, melt the butter and chopped chocolate in the microwave in 30-second increments, stirring until fully melted and smooth.
- Add the granulated sugar and mix until combined.
- Add the eggs one at a time, beating well after each addition.
- Stir in the vanilla extract, white vinegar, and red gel food coloring until the batter looks evenly colored.
- In a separate bowl, sift together the cocoa powder, all-purpose flour, and salt.
- Gradually add the dry ingredients to the wet ingredients, mixing until just combined and no dry streaks remain.
- If desired, fold in the white chocolate chips.
- Pour the batter into the prepared pan and spread it evenly.
- Bake for 30–35 minutes, or until a toothpick inserted into the center comes out with a few moist crumbs (not wet batter).
- Cool completely in the pan before lifting out and cutting into squares.
- Optional: Drizzle with melted white chocolate, let it set, then slice and serve.
Notes
- For the fudgiest texture, stop mixing as soon as the flour disappears.
- Do not overbake; pull the pan when a toothpick shows moist crumbs.
- Cool completely before slicing for clean edges.
- Use white chocolate chips mixed into the batter or melt and drizzle on top.
- Prep Time: 15 minutes
- Cook Time: 30 minutes
- Category: Dessert
- Method: Baking
- Cuisine: American
Nutrition
- Serving Size: 1 brownie
- Calories: 250
- Sugar: 20 g
- Sodium: 110 mg
- Fat: 14 g
- Saturated Fat: 8 g
- Unsaturated Fat: 5 g
- Trans Fat: 0 g
- Carbohydrates: 30 g
- Fiber: 1 g
- Protein: 3 g
- Cholesterol: 55 mg