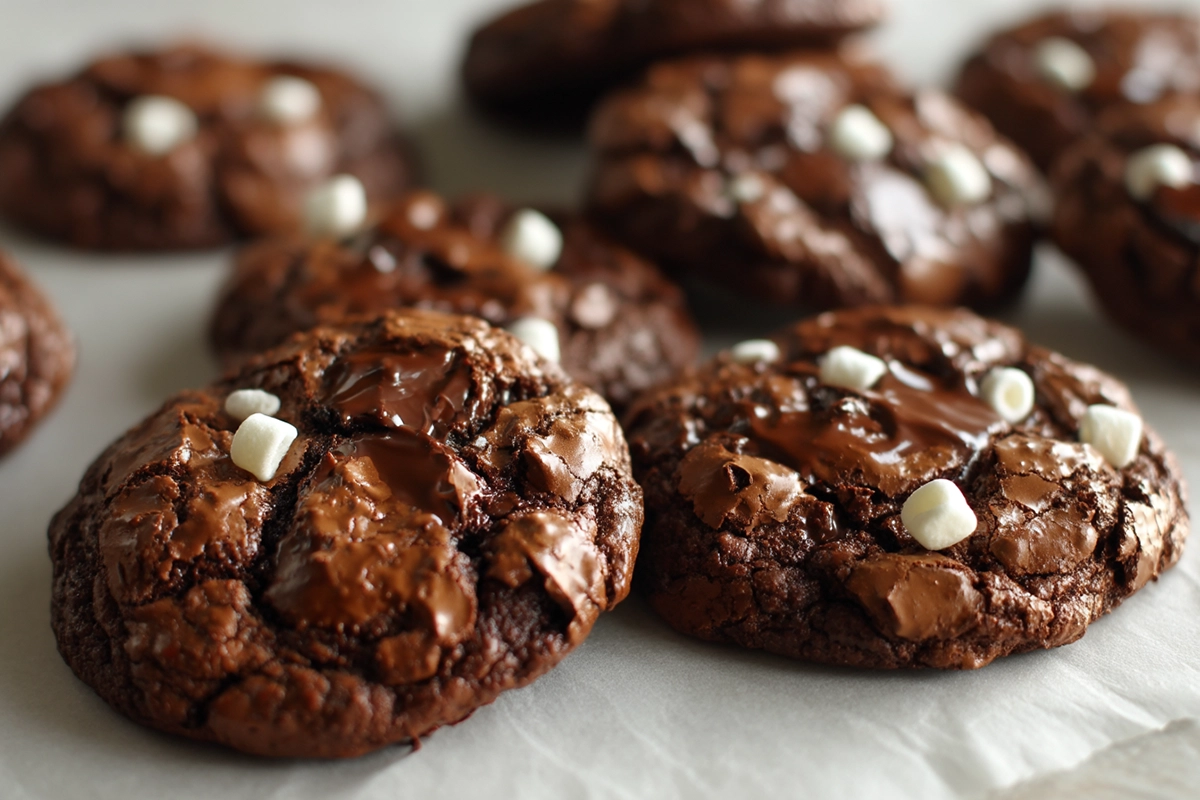
Have you ever craved both a warm, fudgy brownie and a chewy cookie at the same time? Well, we’ve got just the treat for you. Hot Chocolate Brownie Cookies combine the best of both worlds—rich, gooey brownies in the form of a cookie. These cookies have a decadent chocolate flavor, a chewy texture, and a slightly crispy edge that will make your taste buds do a happy dance.
Whether you’re hosting a cozy winter gathering, looking for a fun baking project, or simply satisfying your chocolate cravings, these cookies are a perfect choice. They’re easy to make, delicious to eat, and sure to become a favorite in your dessert rotation. Let’s dive into the details of what makes these cookies so irresistible!
What Are Hot Chocolate Brownie Cookies?
What Makes Them Unique?
Hot Chocolate Brownie Cookies are an exciting twist on two classic treats. Imagine a traditional brownie—rich, fudgy, and dense—turned into a cookie. This hybrid dessert combines the chewy, indulgent texture of a brownie with the handheld convenience of a cookie. The result? A decadent bite-sized treat that melts in your mouth with every bite.
While brownies are typically baked in a square pan and sliced into pieces, these cookies are baked individually, giving each one a perfectly crisp edge and a soft, chewy center. You get all the best qualities of a brownie but in a portable cookie form that’s perfect for any occasion.
The Texture and Taste
The texture of these cookies is what truly sets them apart from regular cookies. They have a slightly crispy exterior with a soft, gooey interior—just like the best brownies. The inside is rich with the taste of dark chocolate, creating a deep, satisfying flavor. Plus, the cookies are filled with pockets of melted chocolate and sometimes even gooey marshmallows, enhancing their indulgent nature.
When baked to perfection, they have that irresistible crinkle on top that you see in traditional brownies. That texture is achieved by whipping the eggs and sugars to help create that perfect crinkled top and chewy inside. Add a dash of vanilla extract and a pinch of sea salt, and you’ve got the ultimate cookie that balances richness and sweetness.
Why You’ll Love Them
Hot Chocolate Brownie Cookies are perfect for chocolate lovers who can’t decide between cookies and brownies. They deliver the best of both worlds: a chewy, decadent center that’s slightly more indulgent than a regular cookie but more portable and easier to enjoy than a traditional brownie. These cookies offer:
-
A rich chocolate flavor that satisfies even the deepest chocolate cravings
-
The chewy brownie texture that feels like a warm hug
-
The convenience of individual servings, so you don’t have to slice or serve them like a traditional brownie
No matter what your usual sweet tooth cravings are, this cookie hybrid is sure to satisfy them. Whether you bake them for a special occasion or just to enjoy with a cup of coffee on a cozy afternoon, Hot Chocolate Brownie Cookies are a treat you’ll want to make again and again.
In the next part, we’ll take a look at the ingredients needed to make these delightful cookies. From the rich dark chocolate to the marshmallow fluff, each ingredient plays a vital role in creating that perfect texture and flavor. Stay tuned!
Ingredients
Essential Ingredients for Hot Chocolate Brownie Cookies
To make these cookies, you don’t need a lot of fancy ingredients. Most of them are probably already in your kitchen. Here’s what you’ll need:
Dark Chocolate
The star of this recipe is dark chocolate. Choose a good-quality chocolate with at least 70% cocoa. This will give the cookies their rich, intense flavor.
Unsalted Butter
Butter is key for creating that soft, chewy texture. Unsalted butter is best because it lets you control the amount of salt in the recipe.
Granulated Sugar & Brown Sugar
You’ll need both granulated sugar and light brown sugar. The granulated sugar helps the cookies spread, while the brown sugar adds moisture and depth to the flavor.
Eggs
You need large eggs to bind everything together. Eggs also help give the cookies their chewy texture.
All-Purpose Flour
The all-purpose flour gives the cookies structure. It helps balance the rich, fudgy chocolate without making them too heavy.
Baking Powder
A little baking powder will help the cookies rise slightly so they aren’t too dense. This creates a lighter, airier texture.
Salt
A pinch of salt balances the sweetness and enhances the chocolate flavor.
Vanilla Extract
Vanilla extract adds depth to the taste and complements the chocolate. Just a teaspoon is enough to make a big difference.
Optional Add-ins for Extra Flavor
While the basic ingredients are simple, you can customize the cookies with a few add-ins to suit your taste.
Chocolate Chips or Chunks
For extra chocolatey goodness, you can add chocolate chips or chopped chocolate chunks. They’ll melt into gooey pockets of chocolate.
Chopped Nuts
If you like a bit of crunch, consider adding walnuts or pecans. The nuts pair beautifully with the chocolate.
Espresso Powder
For a richer chocolate flavor, instant espresso powder is a great addition. It intensifies the cocoa taste without making the cookies taste like coffee.
Mini Marshmallows
You can add mini marshmallows to create a hot chocolate feel. These tiny marshmallows melt perfectly inside the cookies, giving them that gooey, comforting texture.
With all these ingredients, you’re set to make cookies that are packed with flavor. Now that we’ve covered the essentials, let’s move on to the preparation steps. Stay tuned for a simple guide to mixing and baking these perfect cookies!
Preparation Steps
Preparing the Chocolate Mixture
First, you need to melt the dark chocolate and unsalted butter. This is the base of your cookies.
Step 1: Melt the Chocolate and Butter
In a heatproof bowl, combine the dark chocolate and butter. You can melt them in the microwave or use a double boiler. Stir until they are smooth and fully melted. Let the mixture cool slightly before using it in the next steps.
Preparing the Batter
Now, it’s time to make the cookie dough. This step brings all the ingredients together.
Step 2: Whisk Eggs and Sugar
In a large bowl, whisk together the eggs, granulated sugar, and brown sugar. Beat them until the mixture is light and fluffy. This usually takes about 2-3 minutes.
Step 3: Add the Chocolate Mixture
Once the chocolate and butter mixture has cooled slightly, pour it into the egg and sugar mixture. Stir until everything is combined.
Step 4: Add Dry Ingredients
Next, sift in the flour, baking powder, and salt. Gently fold them into the batter using a spatula. Be careful not to overmix. The dough should be thick and smooth.
Step 5: Add Optional Ingredients
If you’re adding chocolate chips, chopped nuts, or marshmallows, gently stir them into the dough. These will give your cookies extra flavor and texture.
Incorporating Marshmallow Fluff
Marshmallow fluff gives these cookies a fun, gooey texture. Here’s how to incorporate it.
Step 6: Swirl in Marshmallow Fluff
Warm the marshmallow fluff in the microwave for about 10-15 seconds so it becomes easier to work with. Then, swirl it gently into the cookie dough. Don’t stir too much, as you want to keep some chunks of marshmallow throughout the cookies.
Now, your dough is ready! In the next part, we will guide you through the baking process. Stay tuned for tips on shaping, baking, and cooling these cookies to perfection!
Baking Process
Preparing the Baking Sheets
Before you bake, you need to get your baking sheets ready.
Step 1: Line the Baking Sheets
Take two baking sheets and line them with parchment paper or a silicone baking mat. This will prevent the cookies from sticking and make cleanup easier.
Shaping the Cookies
Now, it’s time to form your cookie dough into perfect portions.
Step 2: Scoop the Dough
Use a cookie scoop or a spoon to scoop out the dough. Each scoop should be about 1.5 tablespoons of dough. This ensures your cookies bake evenly.
Step 3: Space the Cookies
Place the dough balls onto the prepared baking sheets. Leave about 2 inches of space between each cookie. This allows them to spread while baking.
Baking the Cookies
Now it’s time to bake the cookies.
Step 4: Preheat the Oven
Set your oven to 350°F (175°C) and let it preheat fully before you bake.
Step 5: Bake the Cookies
Put the baking sheets in the oven and bake the cookies for 10-12 minutes. You’ll know they’re done when the tops are cracked and the edges are slightly crispy.
Step 6: Check for Doneness
If you like your cookies a bit softer, take them out at 10 minutes. For crunchier edges, bake them a bit longer. Just keep an eye on them so they don’t burn.
Cooling the Cookies
After baking, you need to let your cookies cool.
Step 7: Let the Cookies Cool
Once they’re out of the oven, let the cookies cool on the baking sheet for 5 minutes. This helps them set.
Step 8: Transfer to a Wire Rack
After 5 minutes, transfer the cookies to a wire rack to cool completely. This will prevent them from getting soggy on the bottom.
Your Hot Chocolate Brownie Cookies are almost ready to enjoy! In the next part, we will explore some fun variations and customizations you can try. Stay tuned!
Variations and Customizations
Flavor Variations
You can make these cookies even more exciting with a few simple tweaks. Here are some fun ideas to change up the flavor:
Mexican Hot Chocolate Brownie Cookies
Add a little spice to your cookies by using cinnamon and nutmeg. This gives them a warm, cozy flavor similar to Mexican hot chocolate.
Peppermint Hot Chocolate Cookies
For a refreshing twist, mix in peppermint extract and top the cookies with crushed candy canes. This is a great option for the holidays or whenever you crave a minty treat.
Dietary Modifications
You can also adjust the recipe to suit different dietary needs.
Gluten-Free Version
To make these cookies gluten-free, swap the all-purpose flour for gluten-free flour. Be sure to check that your baking powder is also gluten-free.
Dairy-Free Version
Use dairy-free butter and dairy-free chocolate if you’re following a dairy-free diet. This way, you can enjoy these cookies without worry.
Lower Sugar Version
For a lower sugar option, use a sugar substitute like Stevia or Monk Fruit. You can also reduce the amount of sugar in the recipe for a less sweet treat.
Now that you’ve got some ideas to make these cookies your own, let’s move on to how to store them. In the next part, we’ll go over how to keep your cookies fresh for longer. Stay tuned!
Storage and Shelf Life
Storing Baked Cookies
If you have leftover cookies, you’ll want to keep them fresh. Here’s how:
Step 1: Use an Airtight Container
Once your cookies have cooled completely, place them in an airtight container. This will help keep them soft and fresh.
Step 2: Store at Room Temperature
Store the container at room temperature for up to 4-5 days. If you want to keep them longer, follow the next step.
Freezing Baked Cookies
If you have a lot of cookies or want to save some for later, freezing is a great option.
Step 3: Wrap Cookies for Freezing
Wrap each cookie in plastic wrap or place them in a freezer-safe bag. This will protect them from freezer burn.
Step 4: Freeze the Cookies
Put the wrapped cookies in the freezer. They’ll stay fresh for up to 3 months. When you’re ready to eat them, let them thaw at room temperature for about 10 minutes.
Storing Cookie Dough
You can also store unbaked dough for later use.
Step 5: Refrigerate Dough
If you plan to bake the cookies within a few days, wrap the dough in plastic wrap and store it in the fridge. It will last for 2-3 days.
Step 6: Freeze Dough for Longer Storage
To store the dough longer, freeze it. Roll the dough into balls and place them on a baking sheet. Freeze for 1-2 hours, then transfer the dough balls into a freezer-safe bag. They’ll last for up to 3 months. When you’re ready to bake, place the dough on a baking sheet and bake directly from frozen. You may need to add a few extra minutes to the baking time.
With these storage tips, your cookies will stay fresh and delicious for longer. Now, let’s move on to the FAQs to answer some common questions about making these cookies. Stay tuned!
Frequently Asked Questions (FAQs)
Can I Use Hot Chocolate Mix Instead of Cocoa Powder?
Yes, you can! Hot chocolate mix can replace cocoa powder, but it will add some extra sweetness. Make sure to reduce the sugar in the recipe if you use the mix. This can also give your cookies a creamier texture.
How Do I Get the Crackled Tops on These Cookies?
To get those beautiful cracks, you need to whisk the eggs and sugar together until they’re light and fluffy. This helps the cookies rise properly. Also, bake at the right temperature and don’t overmix the dough. The cracks will form naturally as they bake.
Can I Add Other Mix-ins?
Absolutely! You can add chocolate chips, nuts, or even toffee bits. Just make sure not to overfill the dough with too many extras. A few mix-ins will keep the texture just right.
How Do I Prevent the Marshmallow Fluff from Sinking?
To keep the marshmallow fluff from sinking into the cookies, try warming it up first. This makes it easier to swirl into the dough. Be gentle when mixing so the fluff stays in pockets within the cookies.
Are These Cookies Good for Gift-Giving?
Yes, they are! Pack them in a cute cookie tin or gift box for a sweet gift. These cookies hold up well and have a great shelf life. They also make a perfect treat for friends and family.
Now that we’ve answered some common questions, let’s wrap it all up with the conclusion.
Conclusion
Why You’ll Love Hot Chocolate Brownie Cookies
These cookies are rich and indulgent. They have the perfect balance of chewy and crispy. With a chocolatey flavor that’s deep and satisfying, they’re sure to become your new favorite treat.
A Fun Twist on Classic Desserts
Hot Chocolate Brownie Cookies are a fun mix of brownies and cookies. The recipe is simple, and you can easily add your twists. Whether you stick to the classic or try some flavor variations, these cookies are always a hit.
Final Tips for Success
To get the best results, remember to whisk your eggs and sugar well. Bake at the right temperature, and don’t overmix the dough. If you follow these tips, you’ll have cookies with the perfect texture and flavor every time.
Enjoy baking and sharing these delicious cookies with friends and family. Happy baking!
Print
Hot Chocolate Brownie Cookies: The Perfect Fusion of Two Favorite Desserts
5 Stars 4 Stars 3 Stars 2 Stars 1 Star
No reviews
- Author: Amanda Thompson
- Total Time: 25-30 minutes
- Yield: 12-16 cookies (depending on size) 1x
Description
Hot Chocolate Brownie Cookies combine the best of brownies and cookies into one irresistible treat. They have a fudgy, chewy center, a slightly crispy edge, and a rich chocolate flavor that will satisfy your deepest cravings. Perfect for any occasion, these cookies are easy to make and sure to impress.
Ingredients
-
8 oz dark chocolate (at least 70% cocoa)
-
1/2 cup unsalted butter
-
3/4 cup granulated sugar
-
1/4 cup light brown sugar (packed)
-
2 large eggs
-
1 teaspoon vanilla extract
-
1 cup all-purpose flour
-
1/2 teaspoon baking powder
-
1/4 teaspoon salt
-
1/2 cup chocolate chips or chunks (optional)
-
1/4 cup chopped nuts (pecans, walnuts, or almonds) (optional)
-
1 tablespoon instant espresso powder (optional)
-
1/4 cup mini marshmallows or marshmallow fluff (optional)
Instructions
-
Prepare the Chocolate and Butter:
-
Melt the dark chocolate and unsalted butter in a heatproof bowl over low heat. Stir until smooth and set aside to cool slightly.
-
-
Mix the Wet Ingredients:
-
In a large bowl, whisk together the granulated sugar, brown sugar, and eggs until light and fluffy.
-
Add the melted chocolate and butter mixture, then mix until combined.
-
-
Add the Dry Ingredients:
-
Sift in the all-purpose flour, baking powder, and salt. Fold gently into the mixture until just combined.
-
-
Add Optional Ingredients:
-
If desired, stir in chocolate chips, chopped nuts, or instant espresso powder for extra flavor.
-
-
Swirl in Marshmallow Fluff:
-
Gently warm the marshmallow fluff and swirl it into the dough without fully mixing it in, so the marshmallows remain in pockets throughout the cookies.
-
-
Shape and Bake:
-
Scoop tablespoon-sized portions of dough and place them on a parchment-lined baking sheet.
-
Bake at 350°F (175°C) for 10-12 minutes, or until the edges are crispy and the tops are cracked.
-
-
Cool:
-
Let the cookies cool on the baking sheet for 5 minutes, then transfer to a wire rack to cool completely.
-
Notes
For a gluten-free version, substitute the all-purpose flour with gluten-free flour.
To make dairy-free, use dairy-free butter and chocolate chips.
These cookies can be made ahead by freezing the dough or storing the baked cookies in an airtight container.
- Prep Time: 15 minutes
- Cook Time: 10-12 minutes
- Category: Dessert, Cookies
- Method: Baking
- Cuisine: American, Holiday Treats